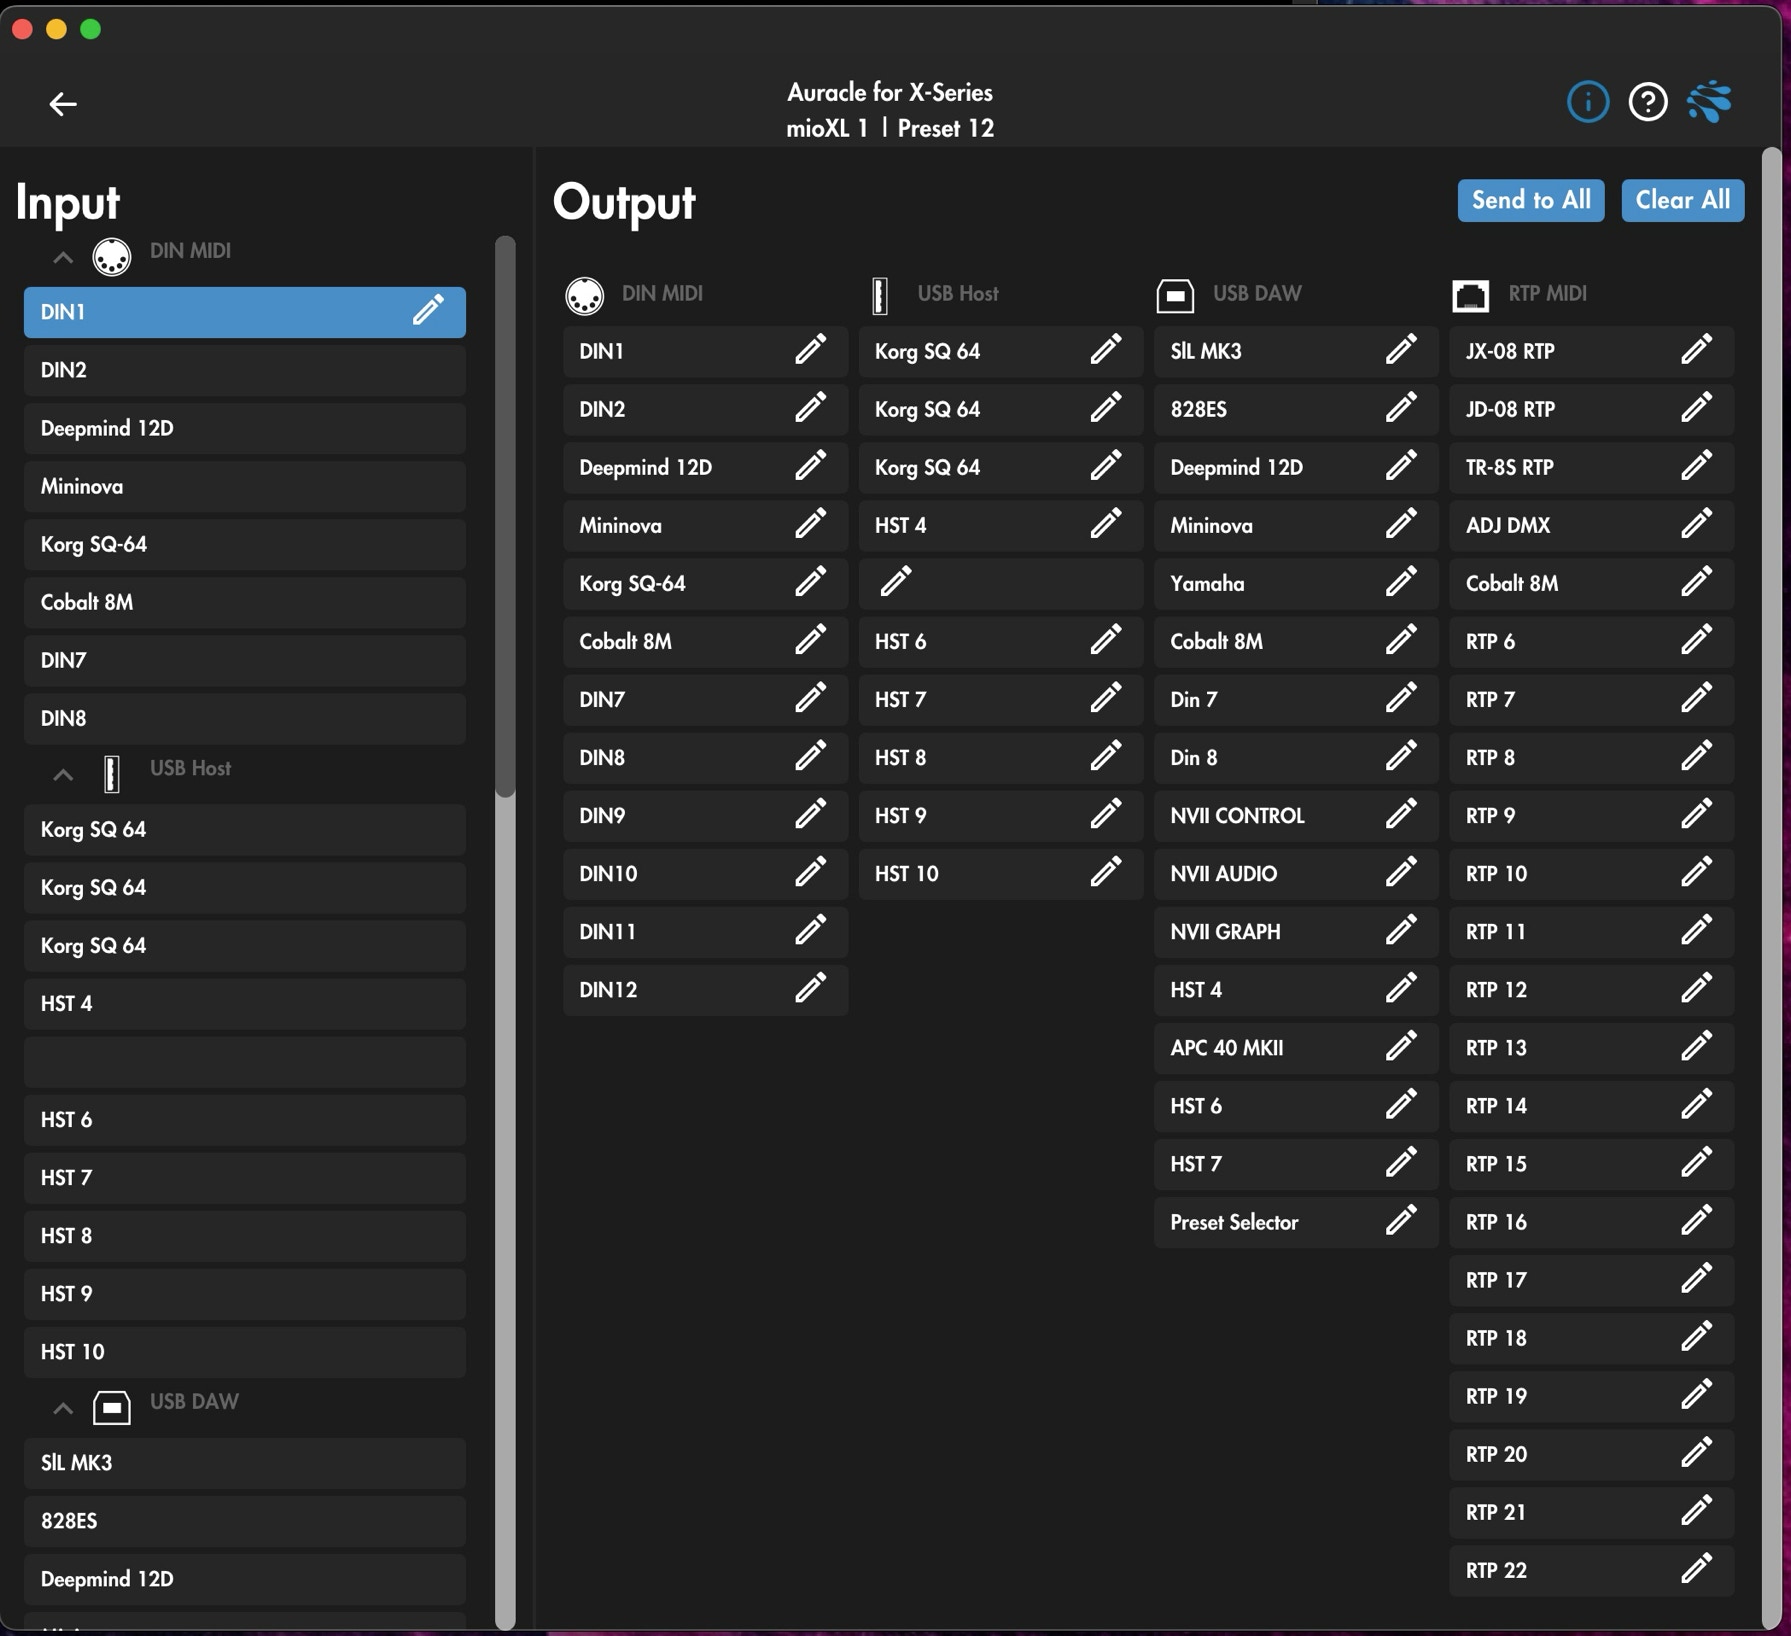
In this example ,at the left column the INPUT from DIN 1 is selected.
Selected items will colour light blue.
Don’t look at the labels naming in the left column, when you first setup all of the names will refer to the specific ports DIN1, DIN2, and so on. You can easily change this by clicking on the pencil icon on the right side of the label.
At the OUTPUT side of the screen nothing is coloured light blue so whatever is coming in on the din 1 INPUT connector …. Is going to parish away into an invisible wall. Sad but true. If this was the DIN port where my beloved SL MKIII would be plugged into, there would be NOT a single thing going out towards ANY of my devices.
More information below the screenshot

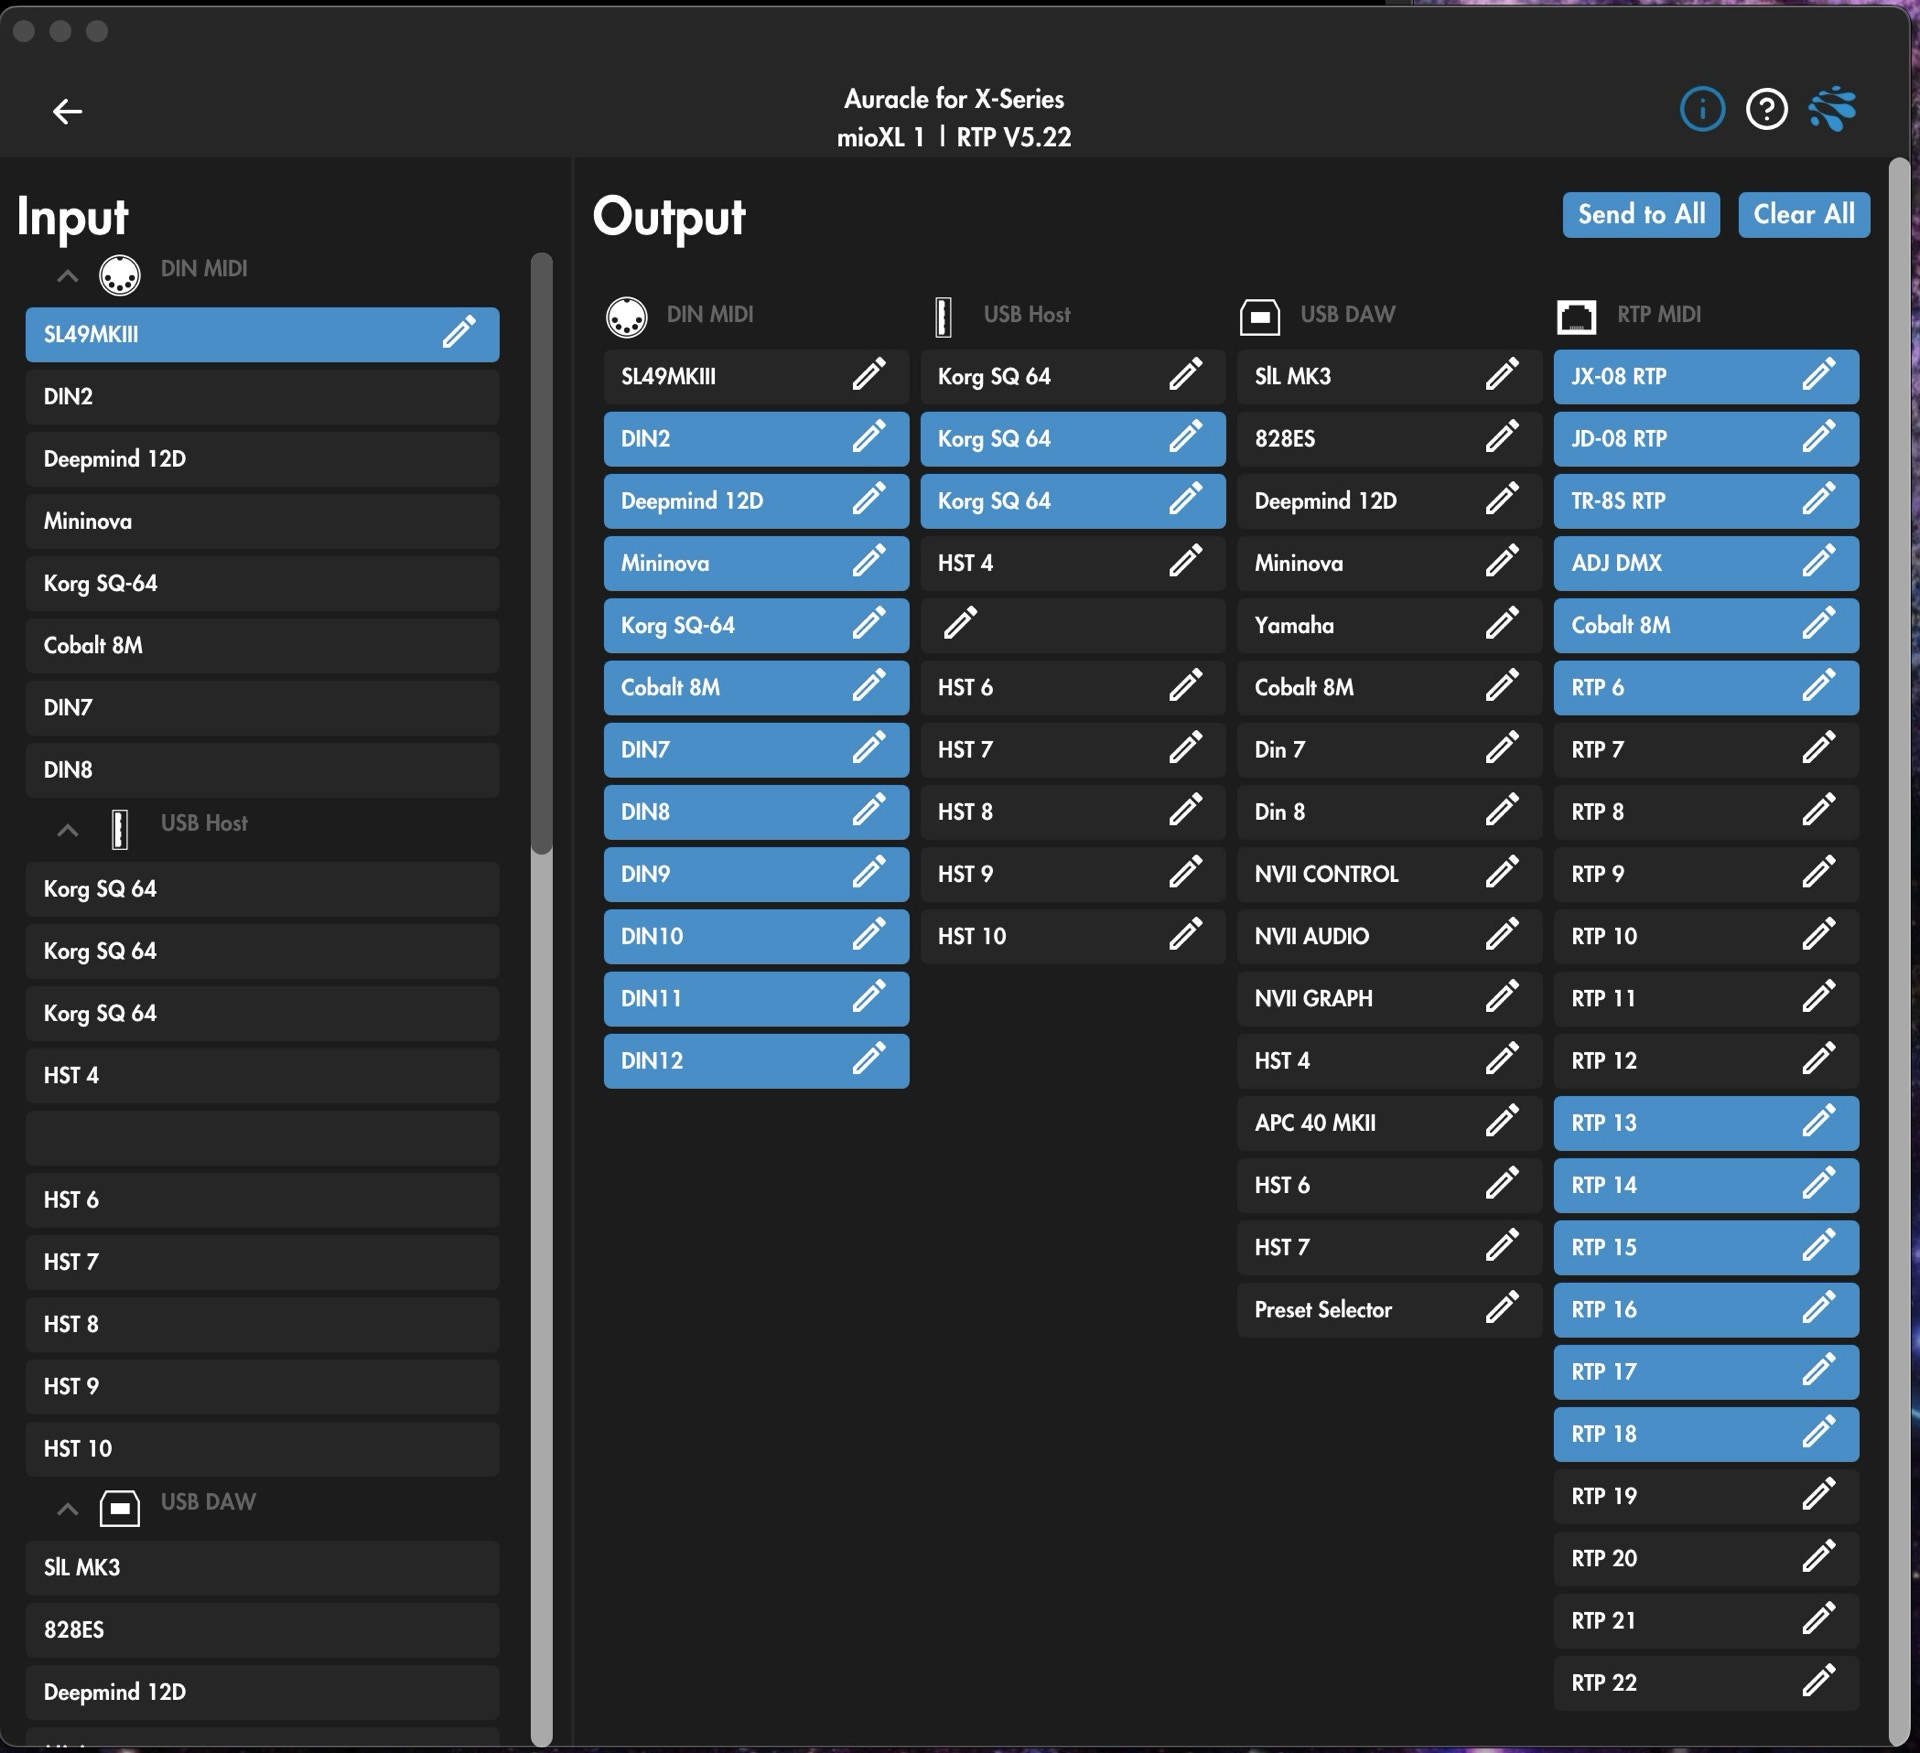
In the next screenshot i renamed DIN1 to SL49MKIII and notice that when you rename the input names, the output DIN names change with it.
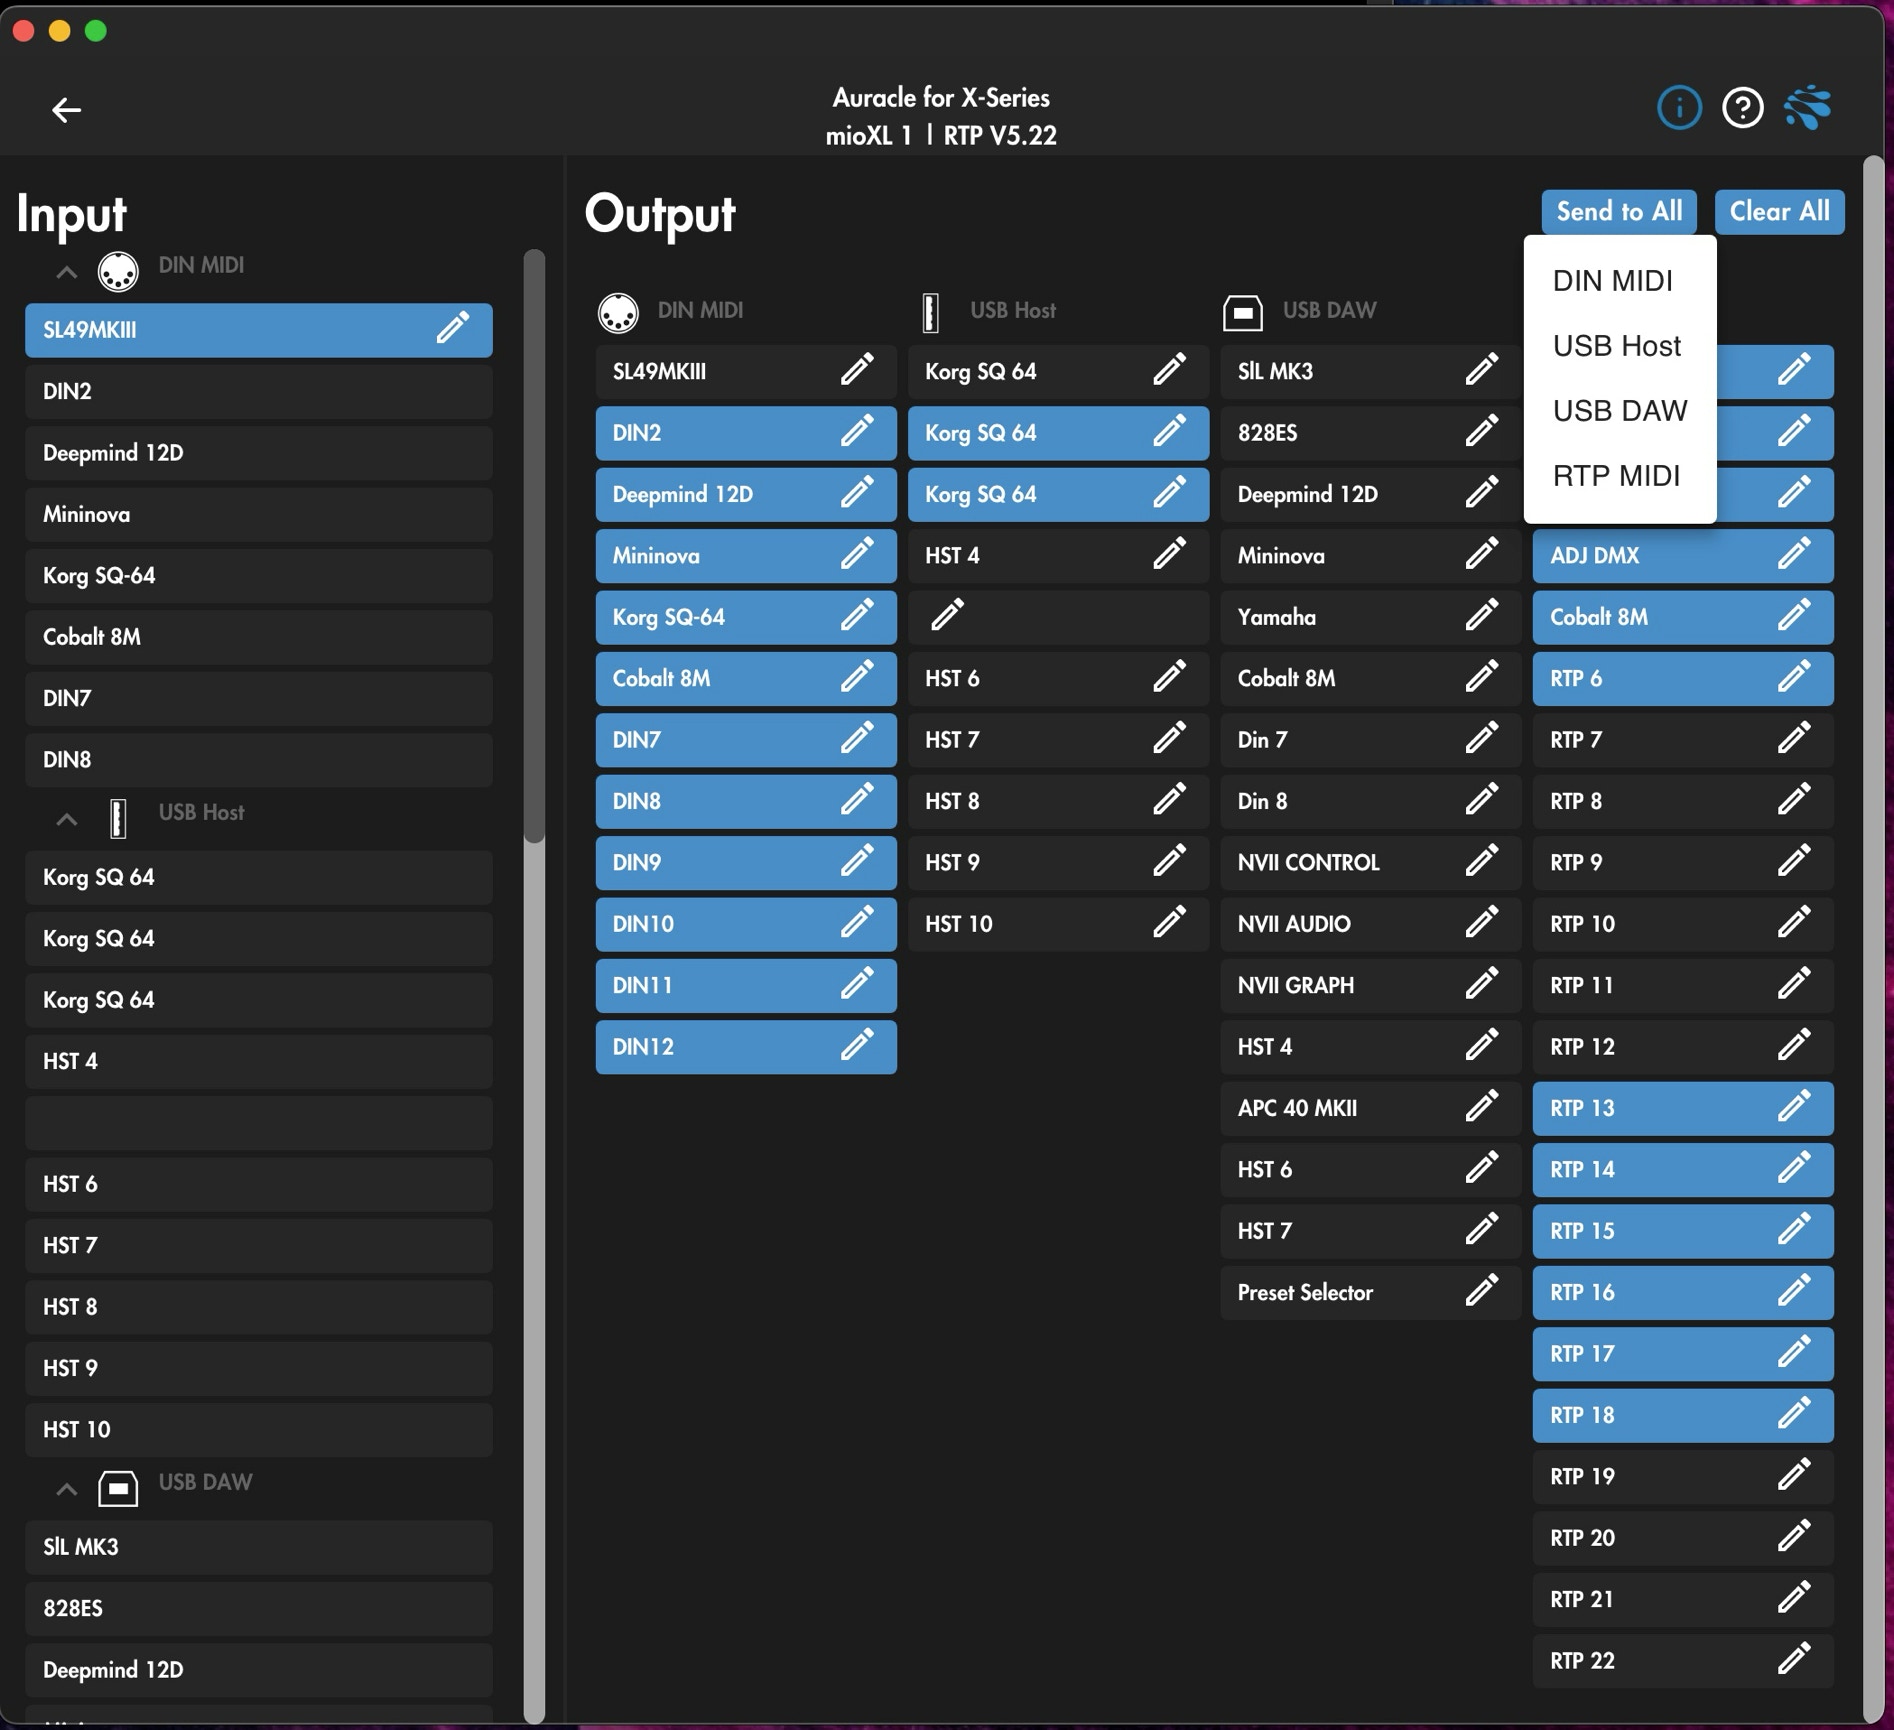
To enable an output simply click on it, OR if you need all of the DIN outputs, click on send to ALL.
There will open a drop down menu where you can select
More information below the screenshot

Selecting DIN midi selects all the DIN midi output ports and so on per category.
This is very handy if you only have one or two or three ports that you don’t need, simply go to the not needed outputs and click on them to deselect .
More information below the screenshot


